You heard me: Perspective.
Lets tackle it.
For some Artists, perspective is that thing that hides under the bed and goes bump in the night. And it's everywhere. And so they hide behind "well, my style....." excuses so they don't have to learn it. For others, it's a dear friend we can't live without.
It's one of the things every artist needs to be familiar with. So lets learn it. I'm going to take one of my images and break down how I created the perspective in it.
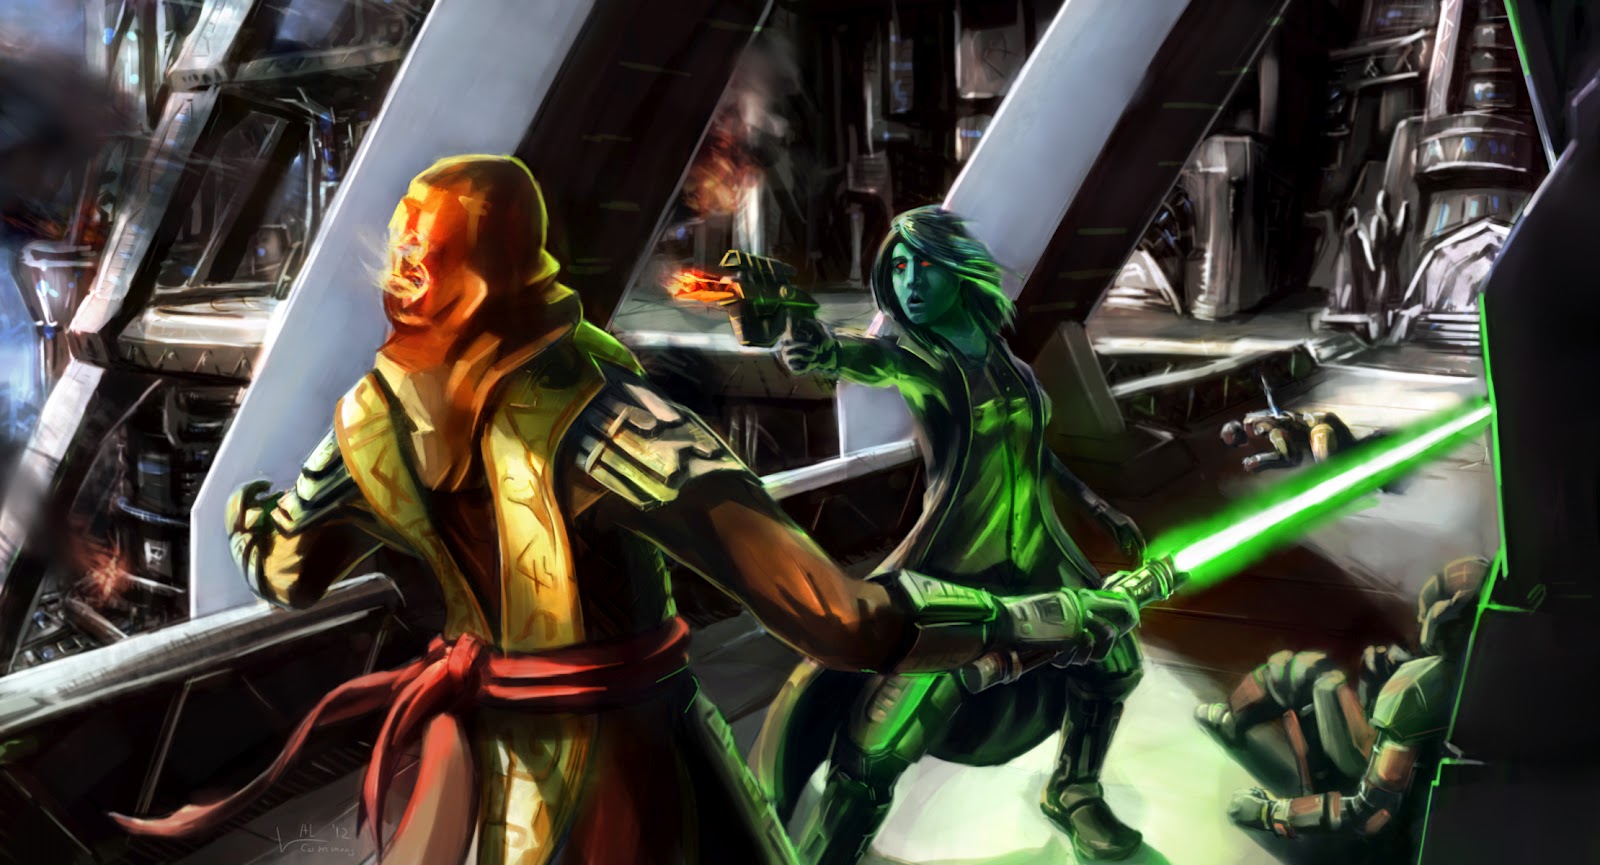
Here's the image I'm going to be using because it has a good amount of lighting, archtitecture, and characters in the environment. For those of you who are new, this image was apart of my Introduction (first) post
here.
And here's the rough of the image I was working with.
So first, we need to set up our perspective grip.
First, we need to find the horizon line. The horizon line will always be at eye-level with the camera/viewer. For almost every medium from television series, comics, and film, your horizon line is not actually at eye-level with a character. Typically, cameras are at hip level to most of your characters.
Step 1 - Draw straight down from the center of the picture to find the Station Point. This is where our audience is.
Step 2 - Find our Vanishing Points and the Cone of Vision
Now we need to find the vanishing points. Where alot of people mess up is that vanishing points need to be at 90* angles from their counterpart. The corner of that 90* angle is the Station Point. Where on the Horizon line they fall is less important then making sure they have a 90* angle between them. One point Perspective, is the exact same as two point perspective, except one vanishing point is parallel to the Horizon line.
We also need to find our Cone of Vision. Anything outside the cone of vision is going to look awkward. Unlike Vanishing Point, The cone of vision sits in the same place every time. 30* to the Left, and 30* to the Right of the Station Point.
So lets apply this to our image. We have the ground plane below the horizon line, and the sky above it.
Lets add some forms to it.
Forms and shapes are easy to add.
All parallel edges will go to the same vanishing point. All purpendicular edges will go to the other vanishing point. Where they converge is where you get your 90* corners. So lets draw some Walls for this scene.
What if you have an object that doesn't match up to the vanishing points you have drawn? Well, then you need to find a new set of vanishing points. These will follow the same rules as the first set. I labeled them A and B in the image above.
Now, we have alot of architecutre along the walls as well. We'll want to divide up the wall so we know where to put these.
There are two ways to divide a rectangular shape up. The first one is drawing lines to each corner. This will give you the exact middle of the shape and you can divide it into half. If you divide one of the halves, you get quarters. If you draw a line from where those cross (the 1/2 divider crosses and the 1/4 divider crosses) then you have 1/3rds.
The other way is to draw a line parallel to the horizon line and to evenly mark a sections off. Next, Draw a line from the last mark to the edge of the object all the way to the horizon line. This is the Measuring Point. Connect the divided sections to the measuring point. Where it crosses the shape is where each section lines up.
If the shape is on the horizon line, you can use a measuring point directly over the vanishing point
For example....
It's really starting to take shape.
Parts 2 and 3 will cover lighting and placing characters in a scene!


